

How to Build a Retaining Wall Along a Driveway
How a retaining wall is built along a driveway: layout, edge protection, excavation, base preparation, drainage and vehicle loads, explained simply.

A retaining wall running beside a driveway has a harder life than the same structure in the middle of a yard. It works next to pavement that cannot be disturbed, in working space that is often tight, and under vehicle loads that may press into the ground it holds back. Building one well comes down to a sequence of careful stages: planning what it must retain, protecting the driveway edge during excavation, setting a solid foundation, and managing drainage where the pavement meets the retained soil. Here is how the process works, stage by stage, and where the line falls between a manageable project and one that needs professional engineering.
Identify What the Retaining Wall Will Retain
Start with the soil, not the wall. A low landscape retaining wall might hold back nothing more than a planting bed or a strip of lawn raised a foot or two above the pavement. A taller wall may retain the bank the driveway was cut into, or the fill the driveway itself sits on. The difference decides how it gets built.
Walk the length of the driveway and note three things:
- How much soil the retaining wall will hold at its tallest point
- Whether the driveway sits above or below the retained ground
- How close the alignment will run to the pavement edge
That planning step shapes every later decision, from excavation method to reinforcement, because a wall retaining a garden bed and a retaining wall holding the bank beside a busy driveway are built to very different standards.
Check the Driveway Edge and Working Space
Building alongside pavement means working in a corridor. Before anything is dug, identify exactly where the driveway edge is and what lies beneath it: concrete, asphalt and paver driveways each carry their edge support differently. Measure the space between the pavement and the planned face. There must be room for the retaining wall system itself, for drainage rock behind it, and for someone to work, compact and backfill.
Restricted access changes the job. A plate compactor may fit where larger equipment cannot, soil may need to move by wheelbarrow rather than machine, and materials get staged on the driveway itself. Plan that logistics corridor before the first shovel touches the ground.
Lay Out the Wall Alongside the Driveway
Mark the alignment with stakes and a string line, running parallel to the pavement or following its curve as the site demands. Keeping the line true beside a long driveway is what makes the finished run look deliberate rather than wavy, so check the string against the pavement edge at regular intervals. Establish the base elevation at the low end and work out where the top should finish relative to the driveway surface and the landscape grade above.
Excavate the Trench Without Undermining the Pavement
This is where driveway jobs go wrong. The trench for the foundation layer must be cut without removing the material that supports the pavement edge, because careless digging here is how driveways crack and settle. Cut the trench to the depth the system requires, in firm ground, and keep the side nearest the driveway clean and stable rather than letting it collapse toward the pavement.
Trench dimensions are not universal. Depth and width depend on the retaining wall system, the soil, whether reinforcement extends behind it, and the manufacturer’s requirements, plus any engineered requirements. Excavate in sections if the ground is soft, so no stretch of driveway edge sits unsupported beside open excavation longer than necessary. Stockpile spoil away from the trench, and keep equipment off the pavement edge itself.
Prepare a Compacted, Level Base
Everything above depends on what happens here. Strip organic soil from the trench, then place compacted aggregate in lifts. Many segmental systems specify crushed gravel for this layer, and some manufacturers approve paver base products for lower walls; the published specification for the chosen system governs, not a universal rule. Where paver base is permitted, it compacts tight and levels easily, which matters in a narrow corridor beside a driveway.
Compact each lift of gravel with a plate compactor and check for level in both directions as you go, then recheck level before any units go down. The goal is a level base from one end of the run to the other, and the blocks will only be as level as this surface, because the run can only be as straight and level as what it sits on. The required thickness and depth vary by system and by site conditions, so follow the manufacturer’s numbers for the product actually being installed.

Set the First Retaining Wall Block Course
The first course carries the alignment for the whole run, and alongside a driveway any error is on permanent display. Position the first retaining wall block at the low end, level the block front to back and side to side, then set the remaining blocks against the string line. Check every individual block for level before moving on; work one block at a time, because a single careless block can telegraph a lean through everything above it.
The course is typically buried to the depth the system specifies, anchoring the structure and guarding the toe from erosion.
Build Up and Backfill the Wall
Subsequent courses follow the manufacturer’s system: the blocks locked by a lip, pins or cores, joints staggered so no seam runs straight down the face, and each course checked for level as it goes. Set aside any chipped block; a damaged unit does not belong in the face. Backfill behind the wall blocks with drainage gravel, compacting in lifts as more blocks go down, and work the compactor near the face only as the manufacturer allows, since heavy compaction right at the face can push courses out of line. Beside a driveway, also keep equipment from bearing on the pavement edge while you work.
Not every retaining wall uses segmental blocks. Poured concrete and grouted masonry follow different construction methods, and where those systems are used the forming, reinforcing and curing steps replace everything in this section.
Drainage Where Pavement Meets Retained Soil
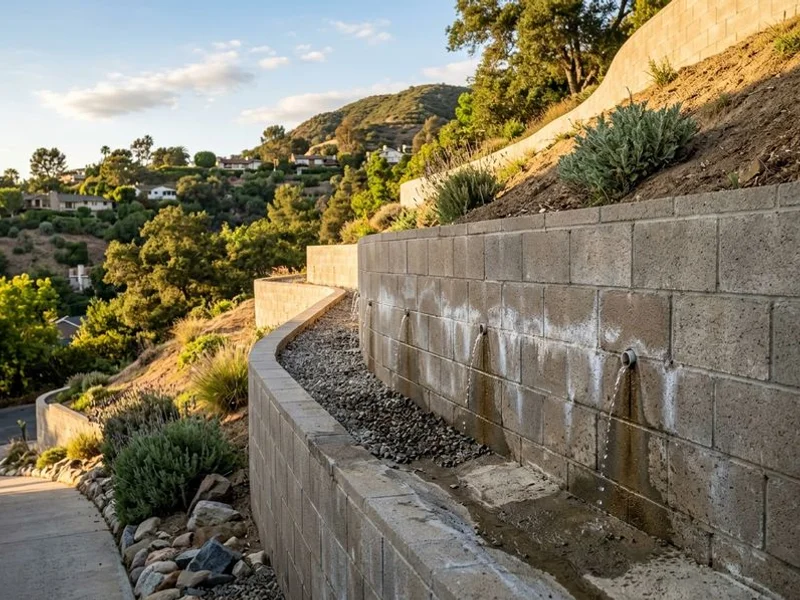
A driveway sheds every drop of rain that lands on it, and the structure beside the driveway sits exactly where that runoff wants to go. Two kinds of water management matter here. Behind the face, free-draining gravel and a perforated pipe along the bottom of the run, where the system requires one, keep ground moisture from building pressure against the structure, with the pipe daylighted to a proper outlet. At the surface, grading and, where needed, a channel drain intercept runoff coming off the pavement before it can soak the backfill.
Never grade the driveway edge so runoff is funneled into the backfill zone, and keep downspouts and irrigation lines out of that zone as well. Water is the most common reason retaining walls near driveways fail early.
Vehicle Surcharge and Wall Height
A retaining wall alongside a driveway may feel vehicle loads even though it does not physically support the pavement. The weight of vehicles on the ground behind or beside the structure adds sideways pressure, known as vehicle surcharge. Whether that load matters depends on distance from the driveway, soil, wall geometry, reinforcement and how heavy the vehicles are; there is no universal safe setback, and placement beside a driveway does not automatically create surcharge.
Wall height raises the stakes on every one of those factors. As height increases, so do structural demands, reinforcement needs, excavation depth and the likelihood of permits and engineering. Treat a tall retaining wall near a busy driveway as a structural project, not a landscape one.
Finish the Wall and Driveway Edge
Cap units finish the run and protect the top course. Where the system calls for it, secure caps with construction adhesive, using the bead pattern the manufacturer specifies for each block cap, and keep adhesive off visible faces. Some systems use purpose-made block caps, others cap with the same blocks turned or cut; either way, the cap line beside a driveway reads at eye level from the street, so keep it straight and level.
Then restore the surroundings: grade the top so water sheds away from the backfill, re-establish planting or lawn, and blend the ends of the run into the surrounding landscape rather than leaving them cut off mid-slope. A finish that suits the home and sits naturally in the landscape grade looks like it was always meant to be there.
When You Need Design or Engineering
Permit thresholds vary by jurisdiction, and many California cities require a permit once a retaining wall passes a set height or whenever it supports a surcharge such as a driveway. In Pasadena, for example, walls over four feet measured from the bottom of the footing, or any wall carrying a surcharge, generally require a permit, and neighboring cities set their own rules, so confirm requirements with the local building department before starting.
Engineering is a separate question from permits. A low landscape wall beside a quiet driveway is one thing; a taller structure near vehicle loads, on poor soil or in seismic country needs an engineered design. Ridgeline plans and builds driveway-adjacent walls across Pasadena and San Marino, coordinating engineering where the site calls for it.
Frequently Asked Questions
Does a 2-foot retaining wall need a footing?
A segmental retaining wall usually does not use a poured footing at any low height; the blocks sit on a compacted gravel or paver base prepared to the manufacturer’s specification. Poured concrete walls are different and normally do have footings. A permit can still apply for low walls where a surcharge is involved.
Does a 3-foot retaining wall need drainage?
Yes. Any wall that holds soil needs a path for water to escape, typically drainage gravel behind the face and, where the system requires it, a perforated pipe. Beside a driveway, surface runoff from the pavement matters just as much as ground moisture.
How close can a retaining wall be to a driveway?
There is no universal minimum distance. What matters is whether vehicle loads reach the wall, which depends on soil, geometry, reinforcement and the loads themselves. Close placement beside a driveway is common, but the closer it sits, the stronger the case for professional assessment.
Can you build a retaining wall yourself next to an existing driveway?
A low landscape retaining wall beside the driveway is within reach of a careful homeowner who respects the base preparation and edge protection stages. Anything tall, anything holding the bank the driveway depends on, or anything close to heavy vehicle loads belongs with a contractor.
Sources
- https://www.allanblock.com/installation/residential-installation/basic-installation
- https://allanblock.com/PDF/AB_Residential_Retaining_Walls.pdf
- https://www.cityofpasadena.net/wp-content/uploads/sites/30/Work-Exempt-from-Building-Electrical-Mechanical-and-Plumbing-Permit.pdf
- https://www.cityofdixonca.gov/media/Permits/Policies%20and%20Information/Retaining%20Wall.pdf
A free on-site consultation, a phased budget tier, and a master plan that fits your property and your goals.