

Protecting Existing Landscaping During Retaining Wall Excavation
Protecting existing landscaping during retaining wall excavation: how professionals shield trees, gardens, irrigation and paving while retaining walls are excavated and built.

Protecting existing landscaping during retaining wall excavation means keeping the trees, gardens, irrigation and paving around the work zone intact while the retaining wall is dug and built. Excavation is the most destructive phase of any retaining wall project, and most of that damage is preventable.
The difference between protected landscaping and damaged landscaping is not budget. It is planning. A good contractor treats landscape protection as part of the excavation plan, not as cleanup after it. Before crews excavate, every barrier, route and cap should already be in place.
This guide covers how professionals approach protecting existing landscaping during retaining wall excavation: what to evaluate before digging, how to shield trees, plants, irrigation and hardscaping during the work, and how to restore the yard after the wall is complete.
What Does Protecting Existing Landscaping During Retaining Wall Excavation Mean?
Landscape protection is a planned set of physical barriers, work rules and sequencing decisions that keep excavation damage inside an agreed work zone. It covers all the landscaping outside the wall line itself: trees and root systems, shrubs and planting beds, irrigation lines and drainage systems, patios and walkways, and the lawn the equipment has to cross.
Protection creates a boundary between construction and landscaping, providing cover for everything the wall cannot move. The purpose of every barrier is to keep damage out of the established landscaping, not to look tidy.
The goal is simple. The retaining wall gets built properly, and the existing landscaping looks untouched when the crew leaves. The necessary protection depends on the site, and the appropriate level depends on what the yard contains. Retaining walls go up in days, but the landscaping around them grew for years. The plan protects the slower asset: the landscaping.
Why Does Excavation Threaten Existing Landscaping?
Excavation damages landscaping through weight, movement and water. Understanding each threat explains each protection step.
Weight compacts soil. A loaded skid steer pressing across a lawn squeezes air out of the root zone below, and compacted soil can stress or kill trees and grass long after the machine is gone.
Movement cuts and scrapes. Tracks tear turf. Buckets clip branches. Trench edges collapse into planting beds.
Water carries the damage further. Open trenches and disturbed soil release sediment, and the first rain sends that sediment across patios, into pools and onto neighboring property.
| Excavation threat | What it damages | The protection that answers it |
|---|---|---|
| Machine weight | Root zones, lawns, soil structure | One matted access route, fenced tree zones |
| Trench and bucket movement | Beds, branches, paving edges | Barriers, flagging, saw-cut edges |
| Excavated soil | Gardens, lawns, drainage paths | Planned stockpile on tarps |
| Dust and runoff | Plants, patios, pools, storm drains | Watering, covers, silt fencing |
| Broken irrigation | Trees and beds downstream | Mapping, capping, prompt repair |
Each of these threats is preventable with ordinary materials and a plan.

How Do You Evaluate Existing Landscaping Before Excavation?
Protection starts with an inventory. Walk the property before the excavation date and record what exists, what matters most and what sits in the machine’s path.
Photograph everything. Existing landscaping, hardscaping, irrigation hardware, fences and lawn areas all get documented. Note the grade and slope of the yard, the spaces machines must cross, and anything above or beneath the surface that a trench could touch, from shallow pipes to house foundations. These photographs do two jobs. They guide the protection plan, and they settle any later question about whether damage is new. Photos address disputes before they start.
Mark what matters most. Flag the trees whose shade cools the home. Explore the whole yard, not just the wall line, and photograph known issues before work begins so nobody debates them later. Flag the garden beds that took years to fill in. Flag the drainage paths that keep the yard dry.
A thorough inventory is the cheapest protection a homeowner can buy. Retaining walls built without an inventory put every plant, pipe and paver at risk.

How Do You Protect Trees and Root Zones During Excavation?
Mature trees are the most valuable and most vulnerable part of existing landscaping. A retaining wall can be rebuilt. A forty-year-old tree cannot.
The protected root zone is the rule that matters. Roots spread outward roughly to the tree’s drip line, the circle under the outer edge of the canopy, and the critical roots sit in the top foot or two of soil.
The standard protection practice is a fenced root zone. Sturdy fencing goes up around the tree at the drip line or as close to it as the site allows, and no machine, stockpile or trench enters that circle. Fencing is not optional near mature trees, and it is needed throughout the project, not just on digging day.
Where the trench must pass near a tree, the plan changes. Roots larger than about two inches across should be pruned cleanly with a sharp cut rather than torn by a bucket. Torn roots invite decay. Clean cuts heal. Substantial root cutting near mature trees should be assessed by a qualified arborist before excavation proceeds.
Water and mulch carry the tree through the stress. A thick mulch blanket inside the fence holds soil moisture and buffers heat, and deep watering before and after excavation replaces what disturbed irrigation cannot deliver.
Cut roots also reduce a tree’s stability in high winds, which is why clean pruning matters. Planting trees back after construction takes decades to replace lost greenery, so the fence is always the cheaper answer.

How Do You Protect Shrubs, Planting Beds and Gardens?
Smaller plants have more options than trees. Shrubs, perennials and garden beds can often be protected in place, relocated temporarily or, as a last resort, replaced.
Protection in place works for beds beside the work zone. Rigid barriers, stakes and visible flagging keep machines honest about edges. Privacy hedges along property lines deserve the same rigid barriers, because a crushed hedge takes years to grow back.
Relocation works for plants inside the work zone. Many shrubs transplant well if they are dug with a generous root ball, heeled into a shaded temporary bed and watered through the project. Label every relocated plant. Retaining walls often take weeks to build, and unmarked shrubs in a temporary bed get forgotten.
Garden beds beside retaining walls face dust, trampling and spilled soil. Barriers and covers keep all three off the plants.
How Do You Protect Irrigation Lines and Drainage Infrastructure?
Irrigation systems are the hidden casualty of retaining wall excavation. Lines run shallow, they cross the work zone in several places, and a single shovel strike can flood a trench or starve a bed of water for weeks.
Map the system before digging. Irrigation plans, valve locations and the visible spray pattern tell the crew where lines run. Most yards have older irrigation that nobody mapped, and lines are rarely located exactly where memory says they are.
Shut down and drain zones in the work area. Pressurized lines under an excavation are leaks waiting to happen. Cap every cut line and flag every cap. A flagged cap costs little. A flooded footing trench costs days. Irrigation must function the day the crew leaves, so test every zone after restoration.
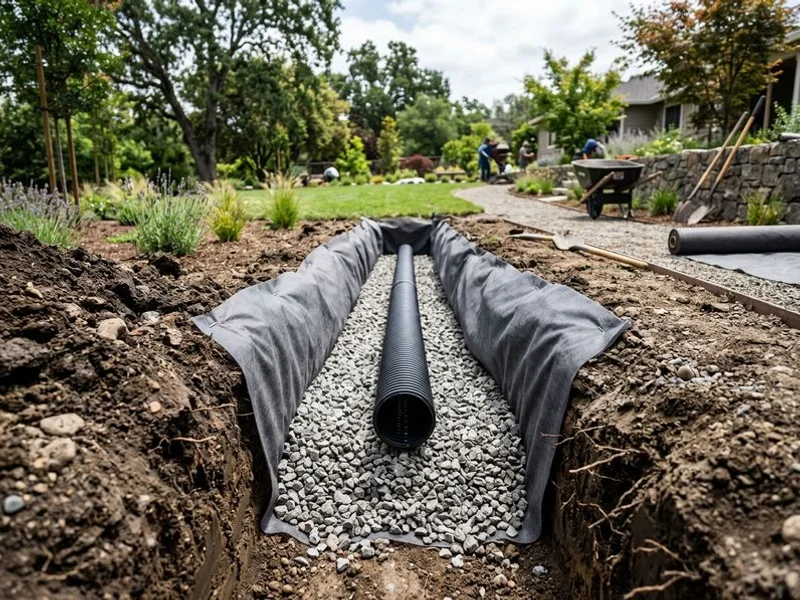
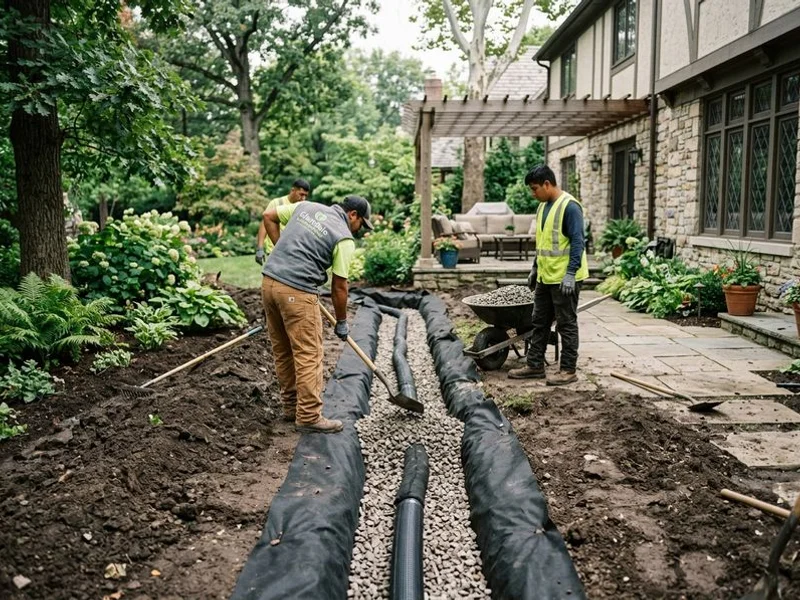
Drainage infrastructure matters as much as irrigation. French drains and swales feeding retaining walls must keep working through the excavation, and any line the trench cuts needs a planned repair, not a buried splice forgotten under backfill.
How Do You Protect Patios, Walkways, Driveways and Pavers?
Hard surfaces look tough and damage quietly. Pavers crack at the edges. Concrete spalls under point loads. Flagstone shifts when the soil beside it is dug away. Other features, like landscape lighting and decorative boulders, need the same thought.
Keep machines off finished hardscaping where possible. Where the route must cross paving, spread the load. Heavy equipment mats are the professional answer. Plywood sheets are the minimum answer, doubled up for loaded machines.
Cover what machines must cross. Permeable pavers and crushed stone paths carry loads differently than poured concrete, and each surface gets its own protection. Outdoor furniture, planters and decor move out of the work zone before excavation day.
Pavers near the trench can be lifted, stored on pallets and re-set on fresh bedding after construction. That is usually cleaner and cheaper than pouring new concrete, and it preserves the existing hardscape exactly.
How Does Equipment Access Planning Protect the Yard?
Every machine reaches the wall line by some route, and that route decides how much of the yard the project touches. A planned route concentrates wear. An unplanned one spreads it everywhere.
Choose a single access path. One corridor, clearly fenced or flagged, concentrates all the wear in one restorable strip, and using the same route every trip reduces the total wear. Even a path on the far side of the yard beats a shortcut through beds. The shortest route is not always the right route. A slightly longer path across plain lawn beats a direct path across an established garden.
Protect the route itself. Mats, plywood or temporary gravel keep equipment from compacting soil and rutting grass. Retaining walls need material deliveries too, so the route must carry pallets and block trucks, not just the excavator.
Fence the perimeter of the work zone so children and pets stay out, and keep the fencing visible. Visibility prevents most accidents and most accidental damage.

How Do You Handle Excavated Soil Without Smothering the Yard?
A retaining wall excavation produces more soil than most homeowners picture. Every foot of trench yields a pile that has to sit somewhere, and somewhere is usually a lawn.
Pick one stockpile location on the plan. The best spot is bare ground or the sacrificial access strip, close enough to the wall line that soil does not get moved twice.
Never stockpile inside a protected root zone. Never stockpile on a garden bed, against a tree trunk or on finished paving.
Soil returns better when it is stored well. Cover stockpiles with tarps, keep piles low near tree roots and return topsoil to beds before replanting. Retaining walls need backfill, and excavated soil can be reused as structural backfill only when it meets the project’s engineering and drainage specifications. Clean, separated topsoil still belongs in beds after the wall is built.

How Do You Control Dust, Runoff, Erosion and Sediment?
Disturbed soil moves. Dust moves it through the air and runoff moves it downhill, and both carry it onto the parts of the yard nobody touched.
Dust control is simple. Light watering of work areas and stockpiles keeps fines on the ground. Dust settles on leaves and blocks the light plants need, so this matters for vegetation as much as for patios and pools.
Runoff control takes structure. Silt fencing or gravel bag barriers along the downhill edge of disturbed areas catch sediment before it leaves the site and before soil erosion starts gullies the crew has to repair. Sediment that escapes smothers lawn and ground covers downhill, and sediment that leaves the property entirely can violate local stormwater rules. Inspect barriers after every watering and every storm.
How Do Protection Standards Change With Wall Size?
Small retaining walls and large retaining walls both deserve protection plans. They do not deserve the same one.
A low garden wall with a shallow trench and hand-digging access might need fencing for one bed, a tarped stockpile and a single matted path. A tall engineered wall with geogrid excavation reaching far behind the wall line is a different project entirely. More soil moves. More of the yard becomes work zone.
Retaining wall design drives the protection plan. The same rules apply to every wall size. The style of the wall, the blocks that build it and the depth of its footing decide how wide the excavation runs. Tall walls bring required engineering and inspection visits, so plan for foot traffic too. Segmental block walls interlock course by course and usually need geogrid behind them, and that geogrid trench can reach back under lawns and beds that look far from the wall line. Match the protection budget to the wall’s full footprint, not just its height.
Materials matter too. Concrete blocks and quarried stone weather differently, and older walls being replaced may show efflorescence, leaning or bulging that changes demolition and protection needs. Commercial retaining wall systems run heavier equipment; backyard hillside walls on sloped residential properties still deserve the same protection practices, scaled to the machines used.
What Protection Materials Should Be on Site Before Digging?
Good protection is mostly ordinary materials staged in advance. A crew that arrives with the right supplies protects on day one. The standard protection kit includes:
- Equipment mats or doubled plywood sheets for every machine route across existing landscaping.
- Sturdy fencing and stakes for tree root zones and garden bed edges.
- Flagging and marking paint for irrigation lines, drainage features and protected zones.
- Tarps for stockpile bases and for covering exposed soil ahead of rain.
- Silt fencing or gravel bags for downhill sediment control.
- Boards and padding for paver edges, corners and steps near the swing path.
- Caps, plugs and repair couplings for irrigation lines in the work zone.
- Mulch for root-zone blankets and final restoration.
Materials that arrive on day one get used. Materials that are “coming later” arrive after the damage they were meant to prevent. Most of these products are basic tools and supplies, and every one of them is easier to install before the dig than after. Simple solutions work. Proper installation matters, so stage materials ready on day one and let the crew handle installing them.

Does the Protection Plan Change in the Rainy Season?
Yes, and Glendale projects feel it. Southern California’s rain arrives in a short winter season, and an open excavation in January behaves differently than one in July.
Stockpiles need covers. Trenches need pumping plans, because standing water and pooling near root zones suffocate trees. Sediment barriers shift from precaution to requirement.
Rainy-season upgrades for protecting landscaping during a wall excavation:
- Cover every stockpile before forecast rain, because excavated soil slumps fast when wet.
- Pump standing water from trenches daily, since pooling near root zones suffocates trees.
- Add gravel bags along the downhill edge of every excavation during storm weeks.
- Mat every crossing twice over, because wet soil compacts deeper under excavating equipment.
- Protect storm drains with filter inserts while the excavation is open.
- Delay backfill if the trench is saturated, because retaining walls need firm, drained footing soil.
Schedule excavation before fall and winter rain where possible. Scheduling is protection too. Excavation finished and backfilled before the first storm season is the cleanest outcome, and planning backward from the rain calendar is part of protecting existing landscaping during retaining wall excavation in this climate.
What Should Homeowners Ask Contractors About Landscape Protection?
Good contractors welcome protection questions. Ask them before you sign anything, and ask how the crew will excavate near trees and lines. The answers tell you whether the crew will treat your landscaping as an asset or as an obstacle.
- Excavation limits: where exactly will the crew excavate, and how wide will the trench be?
- Access routes: how will equipment reach the wall line without crossing lawns and garden beds?
- Tree protection: how will the crew protect tree roots and root zones near the excavation?
- Irrigation handling: who locates, caps and restores irrigation lines during excavation?
- Soil placement: where will excavated soil go, and what protects the grass underneath it?
- Hardscape care: how will patios, walkways and pavers be shielded from equipment and debris?
- Dust and runoff: what controls dust, runoff and erosion while the wall is excavated and built?
- Restoration: what does landscape restoration include, and when does it happen?
Write the answers into the contract. Verbal promises protect nothing once the excavator starts.
How Should Excavation and Landscape Contractors Coordinate?
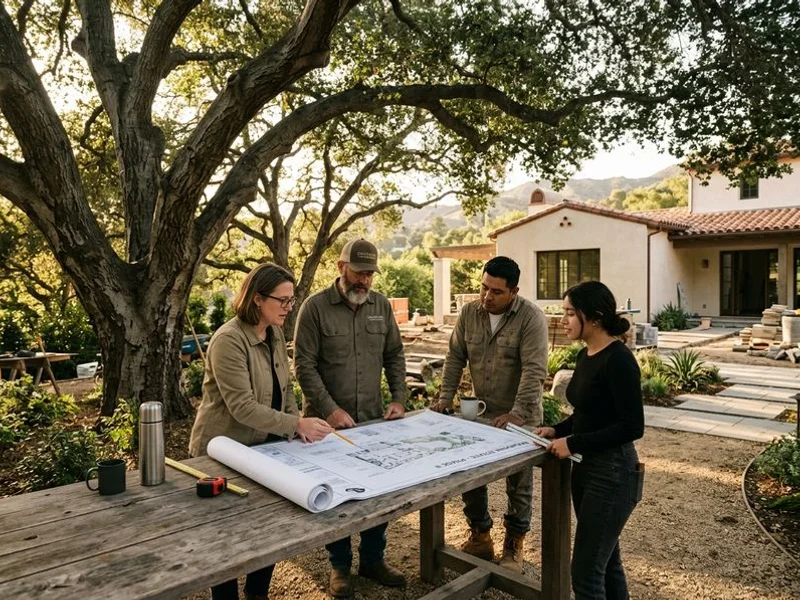
Damage happens in the gaps between trades. The excavation crew assumes the landscaper moved the plants. The landscaper assumes the excavation crew fenced the trees.
One plan fixes this. The protection map, the access route, the stockpile location and the sequence live in a single document that every trade signs off on. A careful contractor will consider how each phase involves the yard, provide the plan in writing and explain what to expect. Quality protection makes the site safer, keeps the work functional and avoids surprises. One walkthrough fixes it further. Before excavation day, the contractor and the homeowner walk the protection plan on the ground and confirm every fence, flag, cap and mat.
Talk to the whole team at the walkthrough, not just the salesperson. A significant share of landscape damage comes from small oversights, and the number one cause is a plan nobody looked at. Walk the site looking for gaps, keep the foreman’s phone number handy, and request fixes while they are small. Good terms in writing help everyone.
Who Is Responsible If Landscaping Is Damaged?
Responsibility belongs in the contract before the project starts, not in a disagreement after it. The pre-construction photographs from the inventory walk define the baseline condition.
A professional contractor states how the site will be protected, what the protection includes and how restoration will be handled. Damage inside the agreed work zone is construction. Damage outside it, to landscaping the plan promised to protect, is normally the contractor’s repair when the contract assigns that responsibility; who pays depends on the contract terms, insurance and what caused the damage.
Ask how claims work before signing. A written quote should name the protection scope, the repair policy and the insurance behind it. Mature landscaping is a real investment, and it supports property value; a protection plan defends both. That promise in writing is part of protecting existing landscaping during retaining wall excavation.
Can Homeowners Handle Landscape Protection Themselves?
Parts of it, yes. Homeowners can photograph the yard, water trees, relocate potted plants and flag known irrigation lines. The structural parts belong to the crew. Machine routes, stockpile placement, trench safety and sediment control need equipment, experience and liability coverage.
Homeowner protection tasks before excavation day:
- Photograph existing landscaping, hardscaping and irrigation from every corner of the yard.
- Water trees and beds deeply in the week before excavation starts.
- Relocate potted plants and outdoor furniture out of the work zone.
- Flag known irrigation lines and private drains for the excavation crew.
- Confirm the protected access route and the stockpile spot in writing.
The honest division is simple. Homeowners own the inventory and the priorities. The contractor owns the physical protection plan, and the two meet at the pre-excavation walkthrough. DIY protection works for the prep tasks; call the contractor when you find problems, because small issues are easier and cheaper to fix before the next phase. Know your limits, learn what the crew installed, and see the protection layout for yourself. There is almost always something a homeowner can handle, like watering, flagging and keeping fences upright.
How Do You Restore and Maintain the Landscape After Construction?
Restoration starts where protection succeeded. Fences come down, mats come up, and the yard underneath should look close to the photographs from day one.
Decompact the traffic zones. Soil pressed hard by machines gets loosened before anything is replanted, because roots cannot push into concrete-hard ground. Regrade to the planned lines. Final grading shapes the site so water drains the way the design intends, with the new wall’s drainage system and the property’s existing drainage working together.
Then water everything back to health. Replant with a selection suited to the new light and soil conditions beside the wall, and keep up basic vegetation management: trimming, mulching and watering. Ongoing maintenance keeps the restored landscaping healthy. Fresh grading, new backfill and re-laid irrigation all stress plants, and deep watering in the first month ensures that roots re-establish in the worked soil.
What aftercare do trees and plants need in the first season?
Protection does not end when the crew leaves. New retaining walls change the conditions plants live with. Mulching, watering and inspection cost little. In colder regions freeze-thaw cycles test new walls; here the cycles are wet and dry instead, and soil saturation after storms is what stresses fresh grading and new planting. Water drainage and soil erosion follow the same rule either way: manage water, and the repair holds. Replacing a mature tree costs years. Understand what the wall does to water movement on your property, watch the drainage after the first storms, and clear weep holes and gravel outlets so hydrostatic pressure never builds behind the wall face.

The Landscape Protection Checklist for Retaining Wall Excavation
Protecting existing landscaping during retaining wall excavation comes down to completing this checklist before, during and after the dig:
- Photograph all existing landscaping, hardscaping and irrigation before excavation.
- Flag every tree, garden bed and landscape feature worth protecting.
- Fence the protected root zone of every mature tree at the drip line.
- Mulch inside tree protection zones to hold soil moisture.
- Decide which shrubs and plants relocate, which stay shielded and which get replaced.
- Map, flag, drain and cap irrigation lines in the excavation area.
- Protect existing drainage systems, including french drains and swales.
- Establish one machine access route and mat it before the first trip.
- Cover paver and concrete crossings with mats or doubled plywood.
- Choose a stockpile location on bare ground, away from root zones and drainage.
- Stage tarps, silt fencing, gravel bags and dust-control watering before digging.
- Cover stockpiles and open soil ahead of forecast rain.
- Protect storm drains downstream of the excavation.
- Keep watering schedules running for trees and retained plants through the project.
- Walk the protection plan with the contractor before machines arrive.
- Decompact trafficked soil before replanting.
- Repair and test every irrigation zone after final grading.
- Replant, mulch and water the restored areas.
- Inspect drainage behind and below the new wall after the first storms.
- Compare the finished yard against the pre-construction photographs.

Protecting Existing Landscaping During Retaining Wall Excavation: FAQ
These frequently asked questions are the ones homeowners ask most before retaining walls break ground near established yards.
Does every retaining wall excavation need a landscape protection plan?
Yes, at whatever scale fits the site. A small wall with a short trench still crosses a yard, and a ten-minute conversation about routes and stockpiles prevents most damage on a small job. Large excavations need the full plan in writing.
How do I protect tree roots when excavating near mature trees?
Fence the root zone at the drip line, keep all machines and stockpiles outside it, prune cleanly any large roots the trench must cross and water the tree through the project. If the wall line passes through the root zone, revisit the wall location or design. Retaining walls can move a few feet. Mature trees cannot move at all.
Will excavation equipment ruin my grass and soil?
Only where it travels. A single matted route concentrates the wear, and trafficked lawn usually recovers with decompaction, regrading and reseeding or sod. Uncontrolled traffic across the whole yard is what ruins lawns.
What happens to sprinklers and drainage during retaining wall excavation?
Zones in the work area get shut down and drained. Lines crossing the wall line get capped or rerouted, hardware gets protected, and the whole system gets repaired and tested during restoration.
Can existing pavers be reused after excavation near a patio?
Often, yes. Pavers can be lifted, stored on pallets and re-set on fresh bedding. That is usually cleaner and cheaper than pouring new concrete, and it preserves the existing hardscape exactly.
How is excavated soil handled without damaging the yard and garden?
It goes to one planned stockpile on tarps or bare ground, topsoil separated for reuse, or it is exported along the protected access route. It never sits on gardens, root zones, paving or other finished landscaping.
Who pays to fix trees, pavers or landscaping damaged during excavation?
The contract should answer that before work begins. Damage outside the agreed work zone is often the contractor’s repair under a written protection scope, but the contract and circumstances determine who pays, and the pre-construction photographs define what is new damage and what is not.
Does landscape protection add a lot to retaining wall construction cost?
It adds materials and some labor, and it saves far more than it costs. Replacing mature landscaping, repairing paving and rebuilding irrigation after avoidable damage is where the real money goes.
How long does landscape protection stay in place during retaining wall construction?
Until the final walkthrough. Fencing, mats, caps and sediment controls stay until the last machine leaves and the restoration is complete. Protection removed early is protection wasted.
How Ridgeline Outdoor Living Protects Existing Landscaping
Ridgeline Outdoor Living designs and builds retaining walls across Glendale and Greater Los Angeles, and landscape protection is built into how the work is planned. Because one company handles the landscape design, the hardscaping and the retaining wall construction, the protection plan, the access route and the restoration are all part of the same project, not a negotiation between separate trades. Homeowners planning retaining wall construction in Glendale get that protection conversation before the first machine arrives. Protecting existing landscaping during retaining wall excavation only fully works before the digging starts.

The Bottom Line on Protecting Existing Landscaping During Retaining Wall Excavation
Protecting existing landscaping during retaining wall excavation is not extra work added to the project. It is the way the project is done when it is done well.
Inventory the yard. Fence the trees. Map the irrigation. Mat the route. Place the stockpile with intention. Control the water. Restore the ground.
The retaining wall will stand for decades. The landscape around it should not have to be rebuilt because of the month it took to build the wall.
A free on-site consultation, a phased budget tier, and a master plan that fits your property and your goals.