

Retaining Wall Planning: What to Consider Before Construction
Retaining wall planning covers purpose, height, soil, drainage, wall systems, engineering, permits, access and budget. Plan the retaining wall before construction begins.

Retaining wall planning decides whether a wall stands straight for decades or leans, cracks and drains poorly within a few years. A retaining wall holds back soil, reshapes a slope and creates usable space. The plans behind it have to cover purpose, height, soil, drainage, engineering, permits, materials, budget and access before construction begins. This guide walks through the complete planning process the way a professional retaining wall contractor approaches it, with specific notes for Glendale and Southern California homeowners.
Retaining Wall Planning: What It Covers
Retaining wall planning is everything that gets decided, measured, designed and organized before any excavation starts. The wall itself may take a week to build. The planning behind it determines whether that wall is legal, stable, well drained and worth the money.
A complete retaining wall plan answers a short list of questions, and a written plan beats a verbal one every time. What will the wall retain, and why? Where does it sit on the property, and how tall is it? What does the soil do when it gets wet? Where does water go? Which wall system fits the site? Who engineers it, who permits it, who builds it, and how do machines and materials reach the wall line?
Retaining wall planning: why does it matter more than construction?
Construction follows the plan. If the plan misjudges the soil, the footing fails. If the plan ignores drainage, water pressure pushes the wall over. If the plan skips the permit, the city can require changes or removal. Most retaining wall failures trace back to something that was knowable before construction and simply never checked.
Planning notes for this step
Wall failures are usually planning failures discovered late.
Plans cost far less than rebuilding a failed wall.
Retaining Wall Planning Starts With Purpose and Function
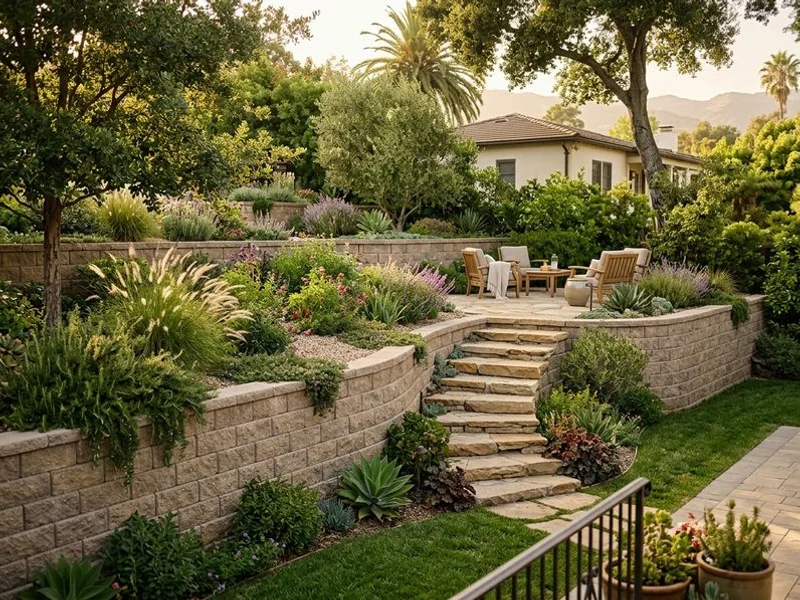
Every retaining wall plan begins with one question: what is the wall for? A single wall can serve structure, access and planting at once. The function shapes the height, the location, the system and the budget.
Common purposes on Southern California properties include:
- Retaining a slope to create a level area for a patio, lawn or garden.
- Protecting a driveway or foundation from soil movement above or below.
- Controlling erosion on a hillside lot.
- Replacing a leaning or failed older wall.
- Framing raised gardens, planting beds or seating areas.
- Creating flat, usable space on a sloped yard.
A wall that retains a steep cut under a driveway carries a surcharge load, which is extra weight pressing on the soil the wall holds back. A low garden wall around flower beds carries almost none. These are different structures with different plans, different engineering needs and different price tags.
Planning notes for this step
Wall purpose decides the load the wall must retain.
Retaining walls near driveways and foundations need engineering attention early.
Planning the Wall Location and Layout

Where the wall sits matters as much as how it is built. Location decisions touch property lines, views, drainage paths and access, and they are hard to change once the footing is in.
Start with the property map. A wall planned near a boundary line needs a verified line, not a guess based on an old fence. Fences wander over the decades, and a wall built on the wrong side of a line becomes an expensive legal problem. Shared slopes between neighbors add another layer, since a wall can change how water and soil move onto nearby properties.
Layout choices come next, and local setback rules belong in that conversation, since some walls must sit a minimum distance from property lines or structures. Straight walls are the most economical. Curves soften a landscape and add strength in some block systems, but they take more cutting and more time. Corners, steps and terracing all change the engineering. Steps or a landing near the center of a long wall also break up the run visually. Two shorter terraced walls with a planted bench between them can sometimes replace one tall wall. Terracing lowers the load on each wall and can bring a project under permit height triggers.
Planning notes for this step
Walls on or near property lines need a verified boundary before design.
Plans for terraced walls can reduce height, load and permit exposure.
Wall layout: how do curves, corners and terracing affect construction cost?
Every curve, corner and elevation change adds labor. Terracing adds a second footing and a second wall, but it can remove the need for engineering or geogrid reinforcement on a taller single wall. A tiered pair of walls also creates planting room that a single tall face never offers. The cheapest layout on paper is not always the cheapest layout to build, so layout belongs in the planning conversation with real numbers attached.
Wall Height: The Decision That Changes Everything
Height is the single planning decision that changes the most downstream answers. In Glendale and across most of California, the practical dividing line sits at 4 feet. A retaining wall over 4 feet, measured from the bottom of the footing to the top of the wall, generally requires a building permit, and permitted walls generally require engineering.
That measurement point surprises homeowners. The footing is buried, so a wall that looks 3 feet tall above ground can legally measure over 4 feet once the embedded portion counts. Plan height from the bottom of the footing, not from the soil surface.
Height also drives structural behavior. Short gravity walls rely on their own weight to resist soil pressure. Taller walls need reinforcement, usually geogrid layers extending back into the soil, or one of the cantilevered retaining walls built from poured concrete with an engineered footing. As height climbs, the margin for error shrinks, and the value of a proper design climbs with it. Anyone planning a wall near the 4 foot line should measure carefully, because the requirements change completely on the far side of it.

Planning notes for this step
Wall height over 4 feet usually triggers a permit and engineering.
Plans should always measure height from the bottom of the footing.
Retaining Wall Planning for Soil and Site Conditions
Soil decides how hard the wall must work. Retaining wall planning has to answer three soil questions: what the wall retains, what it stands on, and what the site does with water.
Soils vary across Greater Los Angeles. Some neighborhoods sit on dense, well draining material. Others sit on expansive clay that swells when wet and shrinks when dry, pressing against walls and footings season after season. Fill soil placed by a previous owner decades ago behaves differently from native ground, and a wall footing should never rest on fill that was not properly compacted.
Engineers describe soil strength partly through its friction angle, which affects how hard the retained soil pushes. Homeowners do not need the math or the technical vocabulary. They need a plan that respects it: the right footing depth, the right reinforcement and the right backfill for the actual soil on the actual site.
Slopes above and below the wall line change the picture again. A wall holding a slope with a driveway at the top works harder than the same wall holding a lawn. Taller walls, steeper slopes and questionable soils are exactly where a geotechnical report earns its cost, because it replaces guesses about the ground with measurements.
Retaining wall loads: what is a surcharge above the wall?
A surcharge is any weight sitting on the soil the wall retains. A driveway at the top of the wall, a parked vehicle, a storage structure, a deck, a pool, an outdoor kitchen or a fire pit all count. Slopes above the wall count too. Each surcharge adds design load, so the planning stage has to list everything that will ever sit above the wall, not just what sits there today.
Planning notes for this step
Soil type drives footing, reinforcement and backfill plans.
Retaining walls on fill or expansive clay need extra care in design.
Planning Drainage for Retaining Walls
Water causes more retaining wall failures than anything else. Soil that gets wet gets heavy, and saturated soil presses against a wall far harder than dry soil. Every retaining wall plan needs a complete answer to one question: where does the water go?
A standard drainage design has several parts working together:
- A perforated drain pipe at the base of the wall, collecting water before pressure builds.
- Clean gravel backfill directly behind the wall, so water falls to the pipe instead of soaking the soil.
- Weep holes or daylighted pipe ends that give the collected water an exit.
- Surface grading above the wall that directs rain toward swales and away from the backfill.
- Downspout and irrigation planning, so roof water and sprinklers do not dump into the wall.
The drain pipe must actually lead somewhere. Plans that collect water with no discharge point simply move the problem to the footing. On hillside lots, the discharge location matters to neighbors too, since concentrated water released onto a lower property creates disputes and liability.

Planning notes for this step
Wall drainage is not optional, even for short walls.
Plans must give collected water a legal place to go.
Retaining Wall Systems and Materials

Retaining wall systems fall into two families. Gravity walls resist soil pressure through their own weight. Reinforced walls tie the wall face to the soil behind it with horizontal layers of geogrid, so the soil mass itself becomes part of the structure. Short garden walls can be pure gravity structures. Taller walls, or walls carrying surcharges, usually need reinforcement.
Material options each carry planning consequences:
- Segmental concrete block walls: the most common residential system, with engineered block, geogrid options and many face styles.
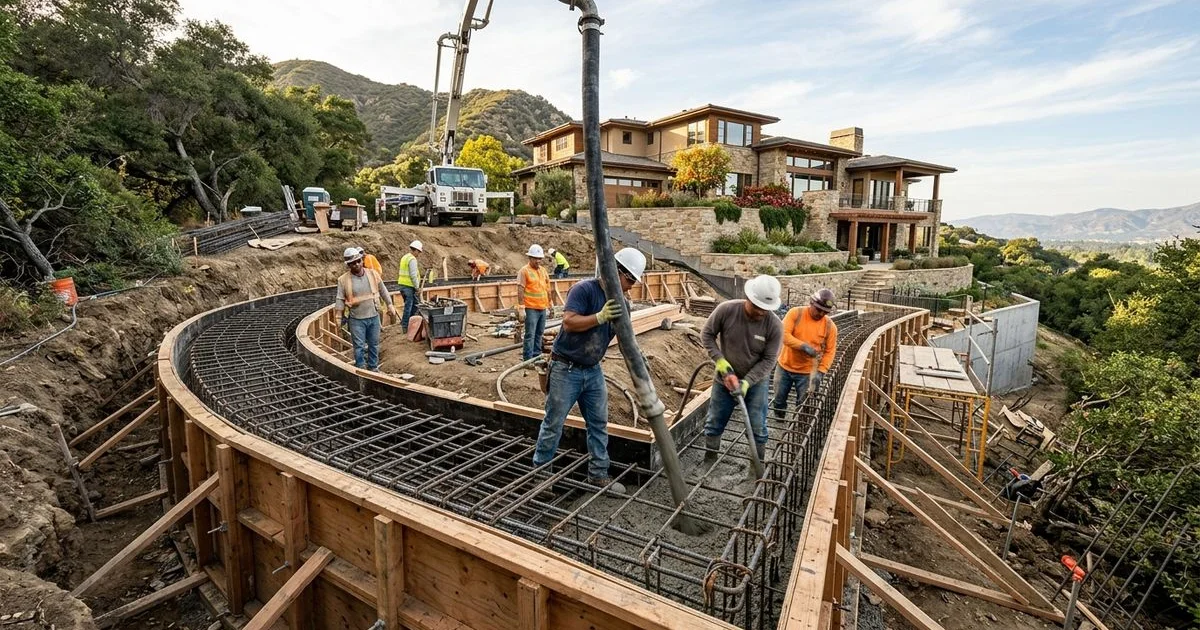
- Poured concrete walls: strong and thin, well suited to tall or heavily loaded walls, but it needs formwork and precise engineering.
- Concrete block walls with stucco or stone veneer: a structural core with a finished face that matches the house.
- Gabion basket walls: stone filled wire cages, heavy and free draining, with a distinctive industrial look.
- Timber and sleeper walls: warm and inexpensive up front, but with the shortest lifespan of any wall product in soil contact.
- Natural stone and boulder walls: striking and durable, at the highest labor cost.
Coping, caps and capstone details finish the top of the wall and protect it from water entering the core. Block products come in many face patterns, so samples are worth reviewing in person for design inspiration. Aesthetics matter here because a retaining wall is a permanent piece of the landscape. The material should work with the patio, the planting and the architecture of the home, not just hold soil.

Wall anatomy: footing, drainage, reinforcement and capstone
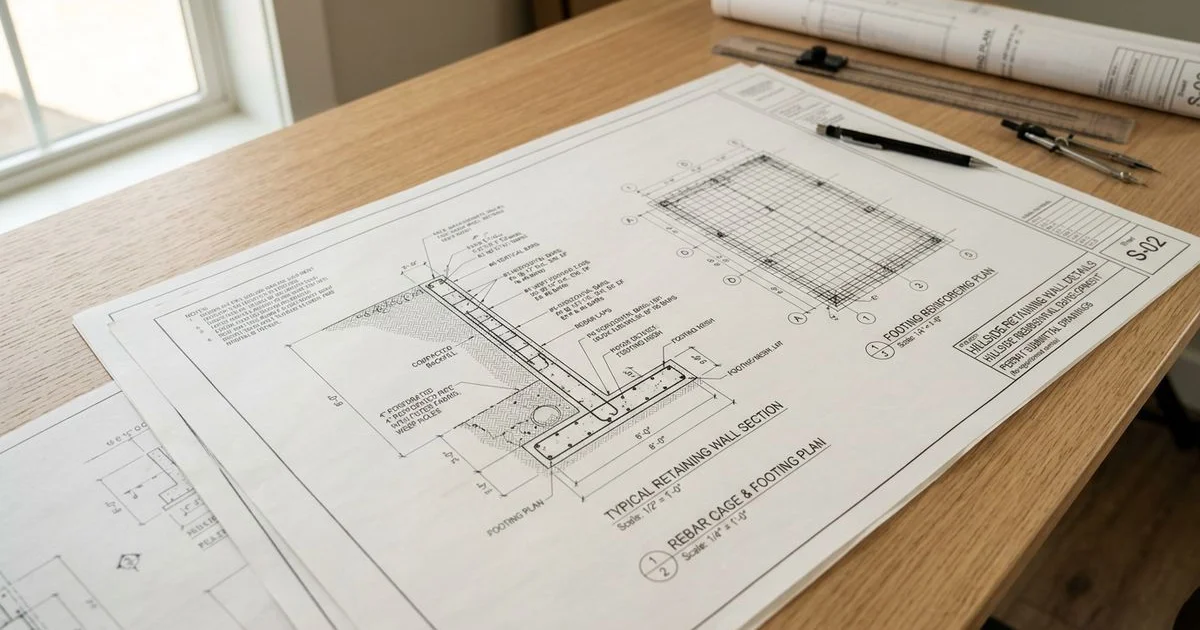
Every retaining wall shares the same anatomy: a buried footing, a wall face, drainage behind it, backfill above that, and a capstone or coping course on top. Reinforced walls add geogrid layers and, in poured concrete, steel inside the stem. The geometry of those parts, how wide the footing is and how far the reinforcement reaches, comes from the design, not from field improvisation.
Retaining wall design: how do lighting, patios and planting integrate?
A wall is one piece of a larger landscape, and the best plans treat it that way. Landscape lighting conduits are cheap when added during construction and costly to retrofit after. A patio or pavers can meet the top of the wall cleanly when heights are coordinated. Planting pockets, shrubs, organic mulch and flower beds soften long faces, and drought tolerant choices like native plants and cacti suit the arid Southern California climate while keeping irrigation off the backfill. Hardscape and planting planned together look designed. Planned separately, they look assembled.
Planning notes for this step
Wall system choice follows height, load and soil, not just appearance.
Retaining wall materials should match the landscape and the architecture.
Retaining Wall Engineering and Permits in California
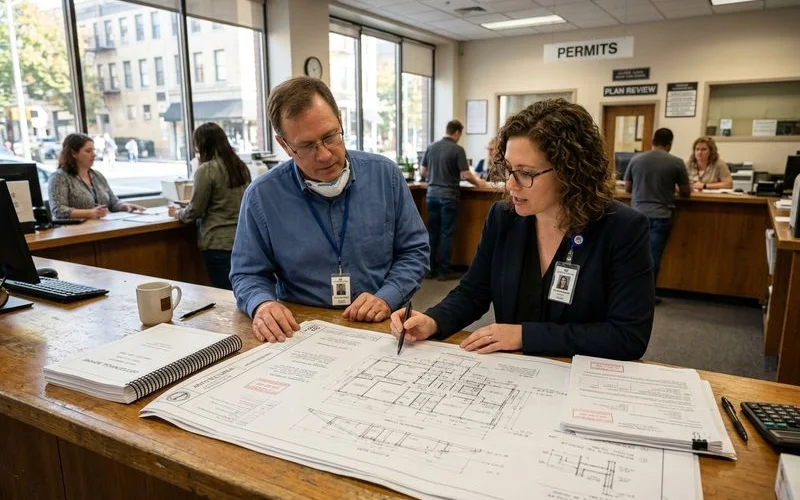
Walls over the permit threshold need engineered plans, and engineered plans need a licensed civil or geotechnical engineer. A landscape designer shapes the layout and finishes, while the engineer sizes the structure. The engineer sizes the footing, specifies the reinforcement, checks the soil assumptions and stamps the drawings the city reviews. This is not decorative paperwork. It is the part of the plan that keeps a tall wall standing through wet winters and earthquakes.
Seismic design is a real consideration in Southern California, while frost heave, a major design driver in colder states, barely figures into Glendale planning. Earthquake shaking adds temporary load to the soil pressure a wall already carries, and engineered walls account for it. A permit set for a taller wall will show footing width and edge distances, reinforcement, drainage and backfill specifications, and the city inspector checks the work against those drawings during construction. Those inspections protect the homeowner, and code compliance protects the wall’s value at resale.
Homeowners associations add a parallel review on many Glendale area properties. An HOA can govern wall height, materials, colors and visibility from the street, and HOA approval does not replace a city permit. Both tracks take time, so both belong in the project schedule from the start.
Finally, plan the builder as carefully as the wall. California requires a contractor license for this work, and the planning stage is the right time to verify the license, the insurance and the contract scope. A licensed contractor carries liability and workers compensation insurance that protects the homeowner if something goes wrong on site.
Planning notes for this step
Walls over the height trigger need engineered, permitted plans.
Plans should include HOA review time where an association exists.
Planning Construction Access and Excavation Equipment
A retaining wall is built by machines, and machines have to reach the wall line. Access planning is the part of the project homeowners least expect and contractors price first.
The access questions are concrete. How wide is the narrowest gate, side yard passage or fencing run along the route? A mini excavator can squeeze through a passage around 3 feet wide with its tracks retracted, while larger machines need more room. Can materials reach the wall, or does every block travel by hand? Where do truckloads of soil and gravel get staged, and where does the excavated soil go? What sits in the path: lawn, planting, irrigation lines, a driveway that should not carry a loaded truck?
Tight access does not kill a project, but it changes the plan. An experienced contractor can read an access route in minutes. Narrow access may mean a smaller excavator, more hand digging, longer schedule and higher labor cost. In the tightest side yards, contractors sometimes remove and replace a fence panel, with the neighbor’s permission, to open a route, which is cheap compared to weeks of hand work. Site preparation also covers stripping top soil for reuse and clearing debris and old foundations from the wall line. Where the system requires it, the crew sets a level sand or gravel bedding course. Protecting what stays is part of the plan too: plywood over paving, irrigation flagged, and planting areas the crew must avoid marked before the first machine rolls.

Planning notes for this step
Wall access decides machine size, labor hours and schedule.
Plans should protect driveways, irrigation and planting before machines arrive.
Wall Planning Preparation: Site Survey and Utility Locating
Two preparation steps belong inside every retaining wall plan, and both are covered in detail elsewhere in this series. A site survey documents ground elevations, slope and property boundaries, and the taller or more boundary-sensitive the wall, the more the plan depends on surveyed grades rather than estimates. Underground utility locating is a separate legal step before any excavation. The excavator contacts 811 in the familiar call before you dig process. Utility owners mark their lines, and private locators trace anything the public service does not cover.
Planning is where these steps get scheduled, not skipped. The survey informs the design. The utility marks can even move a wall line, since building over a gas or sewer line is a problem no amount of engineering fixes later.
Planning notes for this step
Wall plans should schedule the survey and the 811 utility locate before design is finalized.
Retaining wall plans may change after utility marks reveal what is buried.
Retaining Wall Budget and Timeline Planning
Retaining wall budgets follow height, length, access and engineering more than any other factor. Material choice moves the number, but structure moves it more. A tall, permitted, engineered wall with tight access can cost several times more per face foot than a low gravity wall with a machine parked beside it.
Honest budget planning separates the knowns from the allowances, and it should allow weeks, not days, for design and permit review. Knowns include design, permits, materials and the labor the site demands. Allowances cover what the ground may reveal: unsuitable soil under the footing, an unmarked private utility line, more excavation than the slope suggested. A contingency allowance is not padding. It is the difference between a surprise and a plan.
Timelines run longer than homeowners expect, mostly before construction. Design and engineering take weeks. Permit review takes weeks more, and HOA review runs in parallel where it applies. The construction itself is often the shortest phase. Material lead times, inspection scheduling and weather windows all belong in a realistic calendar.

Planning notes for this step
Wall budgets follow height, length, access and engineering most.
Plans should carry a contingency for what the ground reveals.
Retaining Wall Planning: The Complete Checklist
A complete retaining wall planning process ends with every box below checked before construction starts:
- Define the purpose of the wall and the space it creates.
- Map the planned wall location against verified property lines.
- Set the wall height, measured from the bottom of the footing.
- Assess the soil, the slopes and any fill the wall will retain.
- Design the drainage: pipe, gravel, weep paths and discharge point.
- Identify surcharge loads, such as driveways or structures, above the planned wall.
- Choose the wall system and materials for the load and the landscape.
- Confirm whether the retaining wall needs engineering and a permit.
- Schedule the site survey and the 811 utility locate.
- Plan equipment access, staging and soil disposal.
- Verify the wall contractor’s license and insurance.
- Build the wall budget with a contingency allowance.
- Set a project plan that includes design, engineering, permit and HOA review.
- Walk the finished retaining wall plan with the builder before excavation starts.

Planning notes for this step
Plans that skip a step here tend to repay it with interest later.
Wall projects run smoothest when the checklist closes before machines arrive.
Retaining Wall Planning FAQ
These are the questions Glendale homeowners ask most frequently during planning. The earlier they get answered, the better the plan.
Retaining wall height: how tall can a wall be before it needs an engineer and a permit?
In California, the practical line sits at 4 feet measured from the bottom of the footing. Above that, permits and engineering generally apply. Below it, good planning still matters, because a short wall with bad drainage still fails.
Retaining wall drainage: do all retaining walls need a pipe, gravel and weep holes?
Yes. Any wall that retains soil needs a drainage plan, even a 3 foot garden wall. Water pressure does not scale down politely just because a wall is short. The drainage system can be simple on a small wall, but it cannot be absent.
Retaining wall plans: what information should a site plan and map include?
A useful site plan shows the wall line, its length and height, property lines, slopes above and below, drainage paths, utility marks and access routes. The taller the wall, the more the plan needs surveyed elevations rather than estimates.
Retaining wall soil: what kind of soil and foundation ground is best to build on?
Dense, native, well draining soil makes the best footing ground. Loose fill and expansive clay need special attention, and a footing should never rest on uncompacted fill. A geotechnical report answers this question with measurements instead of guesses when the wall is tall or the soil is doubtful.
Wall design: can two short retaining walls replace one tall wall?
Often, yes. Terracing splits one tall wall into two shorter walls with a level bench between them. Each wall then carries less load, and each may fall under permit and engineering triggers. The tradeoff is a wider footprint and more total material.
Retaining wall planning: can tree roots damage the wall or its footing?
Yes. Roots press against walls and footings as they grow, and removing a large tree near a wall can also shift the soil as roots decay. Plan wall lines around significant trees, and plan tree work with the wall in mind.
Wall systems: what is the difference between a gravity wall and a geogrid reinforced wall?
A gravity wall resists soil pressure with its own weight. A reinforced wall uses geogrid layers extending into the soil behind it, so the retained soil helps hold the wall. Reinforced systems handle taller heights and heavier loads.
Retaining wall permits: does HOA approval replace a city construction permit?
No. HOA approval and a city permit are separate tracks. An association can approve a wall the city would reject, or the reverse. Projects in planned communities need both, and both take schedule time.
Planning notes for these questions
Wall questions are cheapest to answer before construction starts.
Planning answers age, so verify rules close to the build date.
Planning Retaining Walls: How Ridgeline Outdoor Living Works
Ridgeline Outdoor Living designs and builds retaining walls for residential and commercial properties across Greater Los Angeles, and planning is where our projects are won. A typical Ridgeline plan starts with site photos, the slope, the soil, the surroundings and the access. It moves through design, engineering and permitting where the wall requires them. And it schedules the survey, the utility locate and the equipment path before any excavation begins. Homeowners considering retaining wall construction in Glendale get a plan that covers every step in this guide, so the construction phase holds no surprises that planning could have prevented. Whether the project is a small garden wall or a full hillside installation, the planning work is thorough before the work zone opens.
Retaining Wall Planning: The Bottom Line
Retaining wall planning is not a delay before the real work. It is the work that makes construction routine. Define the purpose, fix the location and height, respect the soil, design the drainage, choose the right system, engineer and permit what needs it, plan the access, and budget honestly. A retaining wall built on that kind of plan holds its slope, its drainage and its value for decades.

A free on-site consultation, a phased budget tier, and a master plan that fits your property and your goals.